Image Annotation Tool
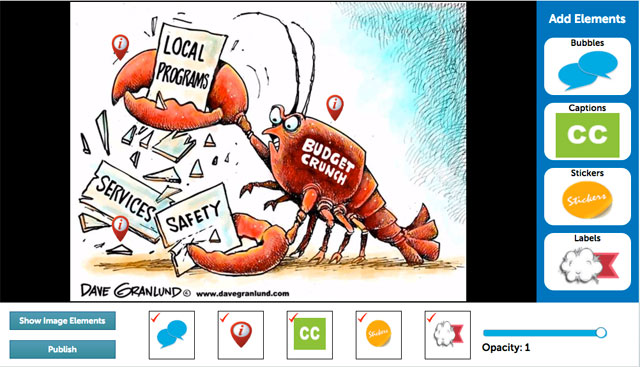
The Council for Economic Education's Image Annotation Tool allows students to creatively comment on political cartoons and other images, and to share their annotated creations with their teachers or fellow students.
Encourage students to create a caption, add thought and/or speech bubbles, and place concept labels and clip art stickers to reinforce the meaning of the cartoon.
As an added challenge, have students use these tools to alter the meaning of the cartoon, presenting a perspective that differs from that of the cartoonist.
Note that there are more pre-defined annotation elements than can be reasonably placed on one image, so students should be judicious in their selections.
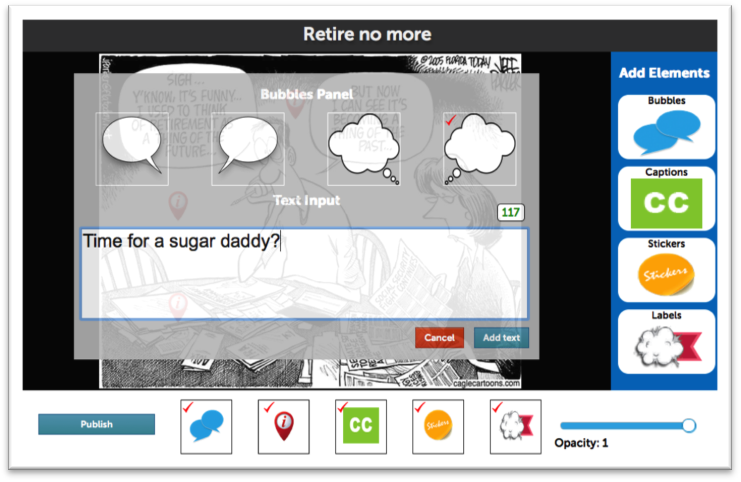
Bubbles Panel
Text Input
140
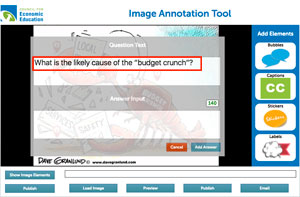
Question Text
Answer Input
140
Add Elements
Bubbles

Captions

Stickers

Labels

This is not a valid URL, please verify it and try again.
|
Question
|
Student Response
|
Setup of New Instance
The purpose of this document is to assist the staff at Council for Economic
Education to set up new instances (cartoons) in the Image Annotation tool for
inclusion into their curriculum.
General Folder Structure
top
Below is an overview of the Folder Structure of the application, indicating the
location of the Folders and Files that will be created to
make new instances.
- assets
The assets folder contains the
graphical assets for the interface of the Image Annotation tool (do not
modify).
- css
The css folder contains the
cascading style sheets for the interface of the Image Annotation tool (do not
modify).
- fonts
The fonts folder contains the
fonts used for the interface of the Image Annotation tool (do not modify).
Includes FontAwesome for the rendering of icons.
- js
The js folder contains the
javaScript file (app.js) which drives the functionality of the Image Annotation
Tool (do not modify).
- outputs
NOTE: The outputs folder
contains the configuration folders for the "student created instances" when they
publish their work. The naming convention of the folders is <name
of parent instance>-< random code of 6 alpha numerical
characters> e.g. "tax-the-rich-b86793". Depending on
usage, and how long CEE wishes to preserve student work, it is recommended that a
CRON job be run on the folder periodically to purge old instances.
- saveConf.php
NOTE: The saveConf.php file
enables the application to create sub-folders in the outputs
folder where the student work is saved (do not edit). It is required that the
production server is set up to allow "php" to create sub-folders in the
outputs directory.
- sources
The sorces folder contains
the source material for the Image Annotation Tool Instances that CEE will be
creating to support its curriculum. A description of the contents of this folder
will be given in the Instance Creation section of this
document.
- toc
The toc folder is a support
folder that provides aa current list of instances that have been created and
these set-up files and documentation.
- vendor
The vendor folder contains
support javaScript libraries that are necessary for the functioning of the
application (do not modify).These include director.min.js,
fabric.min.js, and jquery.js.
The sources folder. Where you create.
top
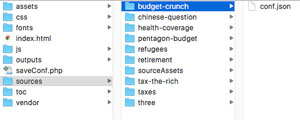
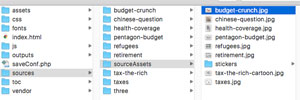
The sources folder contains the individual folders with
the configuration files for the Image Annotation Tool instances and the sourceAssets folder. The sourceAssets folder,
in turn contains all of the individual background image files for the cartoons, and a
stickers folder. Stickers and background images can be used
in multiple instances, depending on what is referenced in the instance configuration
files in the sources folder.
An example structure is shown below.
- sources
-
- sourceAssets
-
- stickers
-
- doctor.png
- donkey.png
- dove.png
- ...
- budget-crunch.jpg
- health-coverage.jpg
- pentagon-budget.jpg
- ...
- budget-crunch
-
- health-coverage
-
- pentagon-budget
-
- ...
Getting Started
top
The best place to get started is to create a manifest of the parts and pieces that
you will need to construct an new instance in the Image Annotation Tool.
| Results |
| # |
What |
Example |
Description |
| 1 |
Background Image |
budget-crunch.jpg |
The background image is the cartoon that the student is going to annotate. The
source image need not exceed 800px in any dimension and be at a resolution of
72 dpi. JPEGs are the recommended file type, but the application will accept
PNGs, GIFs and SVG files. The application will auto-fit the image to the
interface. Given the orientation of the interface, landscape images may be
preferred, but it is not a requirement.
|
| 2 |
Stickers |
donkey.png
elephant.png
police.png
school.png
hospital.png
|
The sticker are visual elements, or icons that the student can place on the
background image to augment or annotate the cartoonist's intent.
These elements can be placed, rotated and scaled by the user. Since scaling is
an option, it is recommended that the format of these files is SVG, however,
other file formats with an Alpha channel can be used. It is recommended that
the maximum dimensions for these images is 300x300px, and preferably in a
square aspect ratio.
These assets are stored in the sources > sourceAssets
> stickers folder. The intent is that CEE will acquire a library of
"sticker" assets that can be shared across multiple instances.
There is no limitation to the number of "stickers" that can be attached to an
instance, but a reasonable limit is six.
|
| 3 |
Questions |
conf.json |
The "Instructor Questions" are activating questions that are incorporated into
the instance for the student to respond to. These questions are accessed by the
student by clicking on the pin icon.
Example questions may
be of the form:
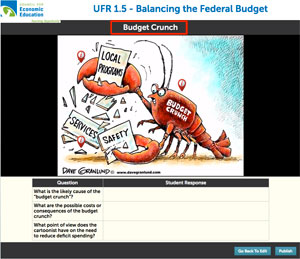
- "What is the likely cause of the budget crunch?"
- "What are the possible costs or consequences of the budget crunch?"
- "What point of view does the cartoonist have on the need to reduce
deficit spending?"
There is no limitation to the number of "Instructor Questions" that can be
attached to an instance, but a reasonable limit is four.
Locating the "pins" on the screen will be dealt with in the "conf.json" section of this document
|
| 4 |
Labels |
conf.json
|
"Labels" are fully customizable value lists that allow the user to attach
labels of different categories to the background image. From a production
standpoint, first define the categories, and then define the values that are
associated with them.
An example is given below:
- NAME: Economic Concepts
-
- OPTION: Tradeoff
- OPTION: Opportunity Cost
- OPTION: Efficiency
- NAME: Political Concepts
-
- OPTION: Role of government
- NAME: Values
-
- OPTION: Freedom of Choice
- OPTION: Equity
- OPTION: Shared Responsibility
- OPTION: Fiscal Responsibility
- NAME: Rhetorical Devices
-
There is no limitation to the number of Label categories or value options
that can be attached to an instance, but a reasonable limit of categories is
four.
|
You are now ready to create the conf.json file
"conf.json" The configuration file
top
The "conf.json" file is a text based file that contains all of the text based
information and pointers to images that will allow the application to instantiate an
instance of the Image Annotation tool. Any text based editor will work, but we
recommend a free text based editor like "Text
Wrangler".
JSON (JavaScript Object Notation) is an open-standard format that
uses human-readable text to transmit data objects consisting of attribute–value
pairs. It is the most common data format used for asynchronous browser/server
communication, largely replacing XML. Values can also be lists of name-value pairs.
The contents of a list are enclosed by square brackets "[]"
An example of a "conf.json" file is shown below
   {
"title": "UFR 1.5 - Balancing the Federal Budget",
"name": "budget-crunch",
"description": "Budget Crunch",
"image": "budget-crunch.jpg",
"questions": [
  {
    "x": 0.6,
    "y": 0.3,
    "text": "What is the likely cause of the “budget crunch”?"
  },{
    "x": 0.2,
    "y": 0.7,
    "text": "What are the possible costs or consequences of the budget crunch?"
  },{
    "x": 0.2,
    "y": 0.1,
    "text": "What point of view does the cartoonist have on the need to reduce deficit spending?"
  }
],
"labels": [
  {
    "name": "Economic Concepts",
    "options": ["Tradeoff", "Opportunity Cost", "Efficiency"]
  },
  {
    "name": "Political Concepts",
    "options": ["Role of government"]
  },
   {
    "name": "Values",
    "options": ["Freedom of Choice", "Equity", "Shared Responsibility","Fiscal Responsibility"]
  },
  {
    "name": "Rhetorical Devices",
    "options": ["Symbolism"]
  }
],
 "stickers": ["donkey.png", "elephant.png", "school.png", "hospital.png", "police.png"]
}
We will step through the name-value pairs in the document and indicate where in
the application they are expressed,
| Results |
| # |
Name |
Value |
Description |
| 1 |
title |
UFR 1.5 - Balancing the Federal Budget |
The "title", is the title of the framing curriculum module. This will be shown
as the header on the student work.
|
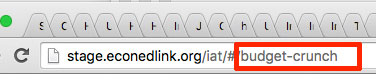
| 2 |
name |
budget-crunch |
The "name", is the name of the folder which contains the "conf.json file.
It is also the
name in the browser URL that is used to locate a particular instance.
|
| 3 |
description |
Budget Crunch |
The "description" is the text string that will show above the annotated image
in the student work.
|
| 4 |
image |
budget-crunch.jpg
|
The "image", is the name of the cartoon file that shows up in the work area of
the Image Annotation tool.
It is located
in the sources > sourceAssets folder.
|
| 6 |
questions |
[
      {
      "x": 0.6,
      "y": 0.3,
      "text": "What is the
      likely cause of the
      “budget crunch”?"
      },
      ...
]
|
Questions are a list of name-value pairs. A list or an Array is enclosed by
square brackets [ ].
Each item in the list is an individual "question" and is a package of
name-value pairs enclosed by curly brackets { }.
Each package has three name value pairs:
[
      {
      "x": 0.6,
      "y": 0.3,
      "text": "What is the likely cause of the “budget crunch”?"
      },
      ...
]
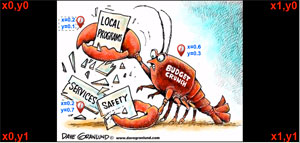
The values for "x" and "y" are for locating the Instructor Question "pin" in the
work area of the Image Annotation too.
The origin point
is the top left of the work area x=0, y=0.
The bottom right represents the value x=1, y=1.
The text: "What is the likely cause of the “budget crunch”?" is
what shows up when the student clicks the "Question Pin".
|
| 6 |
labels |
[
      {
      "name": "Economic Concepts",
      "options":
      ["Tradeoff",
      "Opportunity Cost",
      "Efficiency"]
  },...
]
|
Labels are a list of name-value pairs. A list or an Array is enclosed by square
brackets [ ].
Each item in the list is a a package of name-value pairs enclosed by curly
brackets { }.
Each package in the list contains a "name", this is the name of the label
category, and an array of "options". These are the values that associated with
the "label" category.
i.e.
- Economic Concepts
-
- Tradeoff
- Opportunity Cost
- Efficiency
is represented as:
[
      {
      "name": "Economic Concepts",
      "options": ["Tradeoff", "Opportunity Cost","Efficiency"]
  },...
]
The "labels" are accessed by the student from the right panel of the User
Interface.
This affixes a
the selected label to the screen which the student can then drag to locate.
|
Image Annotation Tool Instructions
Introduction
The Council for
Economic Education's Image Annotation Tool allows students to creatively
comment on political cartoons and other images, and to share their annotated
creations with their teachers or fellow students. These instructions describe how
to use the tool in a general manner. Specific guidance for interacting with
particular cartoons may be provided in associated lesson plans, published on CEE’s
EconEdLink website at http://www.econedlink.org.
Image Annotation Elements
Each cartoon annotation exercise contains several elements that can be added
to the cartoon to comment on it, or to reinforce or change its meaning.
Some of the annotation elements are pre-defined, and some you can create
yourself. These elements are described below.
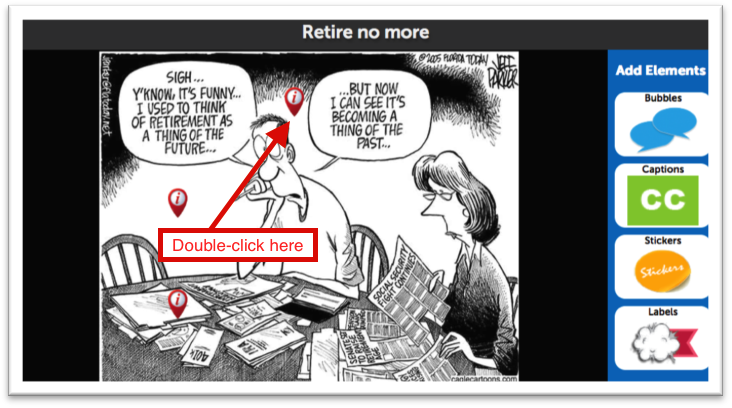
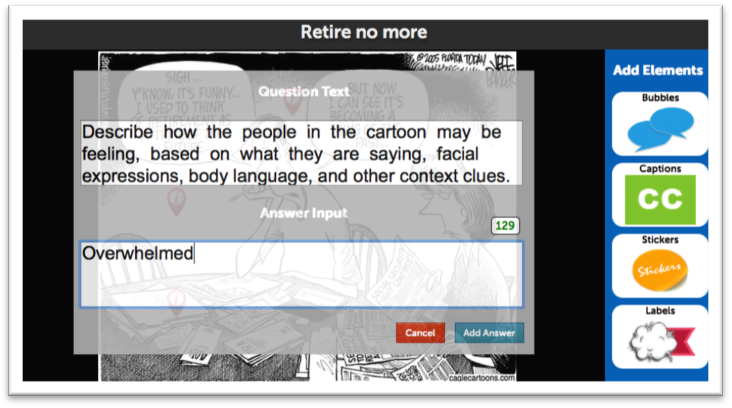
Questions
Each cartoon may contain one or more pre-defined questions, identified by red pushpin icons. Double-click the pushpin to open
a window that will display the question and allow you to type your response to
it. Click the Add Answer button to record your response. The pushpins
will turn green after you answer the question. You may edit your response by
double-clicking the pushpin and following the same steps.
Bubbles
Bubbles are speech or thought bubbles that you create to comment upon the
cartoon. To add a bubble, click on the Bubbles button on the right edge
of the screen. This will open the Bubbles Panel. Select the type of bubble
you’d like to add, either a left or right speech button, with oval shaped
outlines, or a left or right thought bubble, with cloudlike outlines. Click
within the Text Input area and type the text you wish to add. The number in
the upper right corner of the text input area tells you how many characters
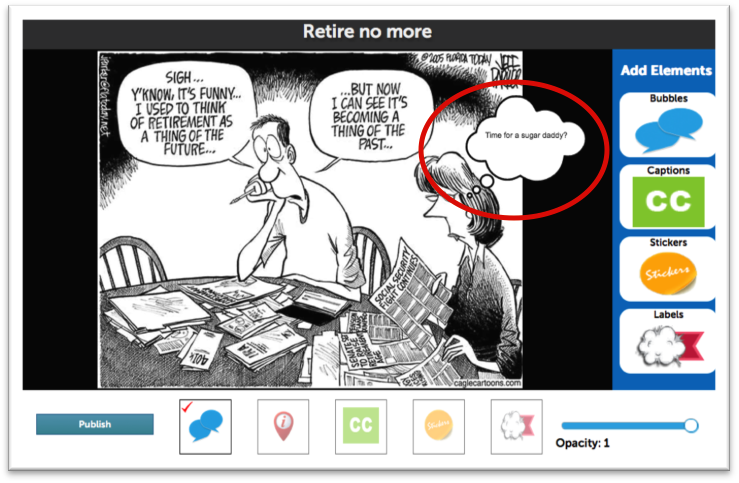
remain of the maximum 140-character limit. Click the Add button to add
your bubble to the cartoon. Drag the bubble to an appropriate area of the
cartoon. You may resize the bubble by clicking on it, then dragging one of the
sizing boxes in the corners of the sticker.
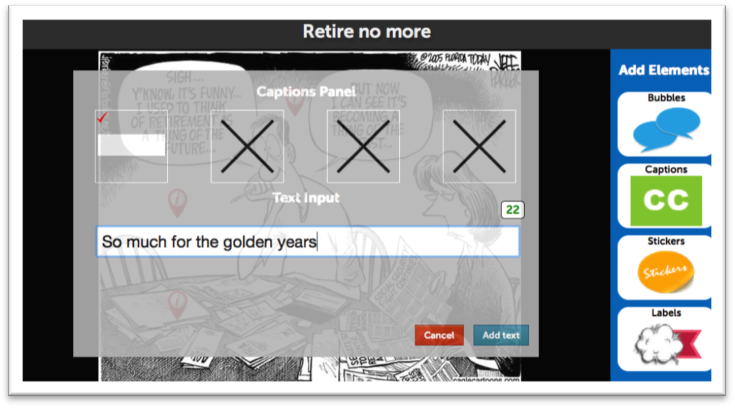
Captions
Captions are text boxes that you create to comment upon the
cartoon. To add a caption, click on the Captions button on the right edge of the screen. This will open the Captions Panel.
Click in the Text Input area and type the text you wish to add to the cartoon.
The number in the upper right corner of the text input area tells you how many
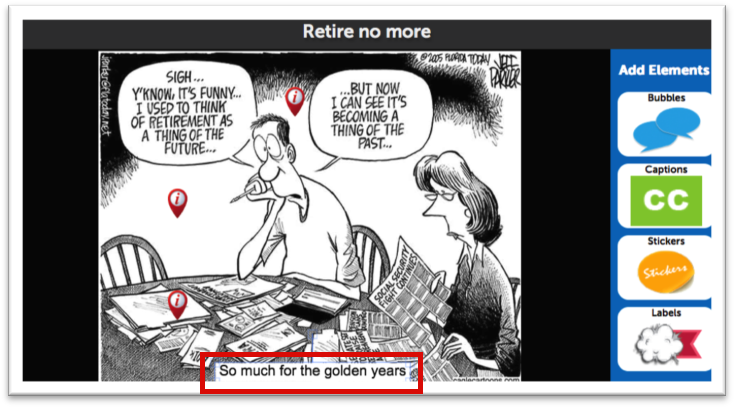
characters remain of the maximum 50-character limit. Click the Add button to add your caption to the
cartoon. Drag the caption to an appropriate area of the cartoon.
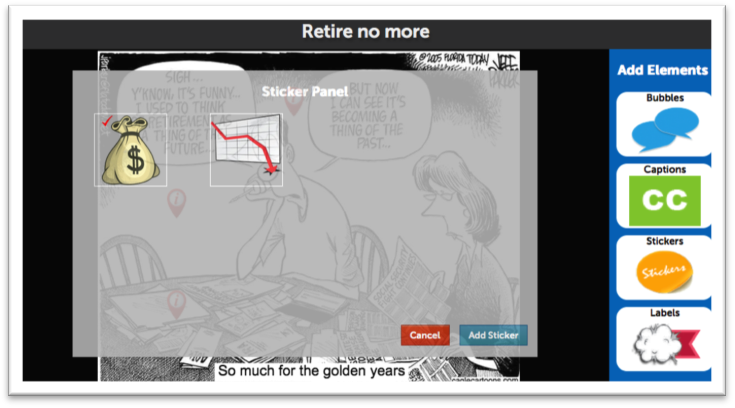
Stickers
Stickers are small illustrations that can be placed on the
cartoon to reinforce or its meaning. To add a sticker, click the Stickers button on the right edge of
the screen, click on the sticker you wish to add, then click the Add button to add the sticker to the
cartoon. Drag the sticker to an appropriate location to comment on the cartoon.
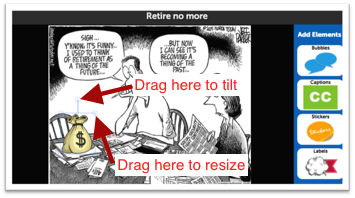
You may resize the sticker by clicking on it, then dragging one of the sizing
boxes in the corners of the sticker. You may tilt the sticker by clicking on
it, then dragging the box at the top of the vertical line ascending from the
top of the sticker.
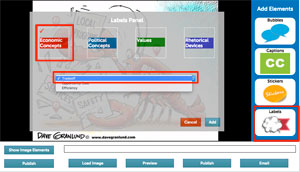
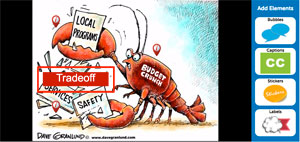
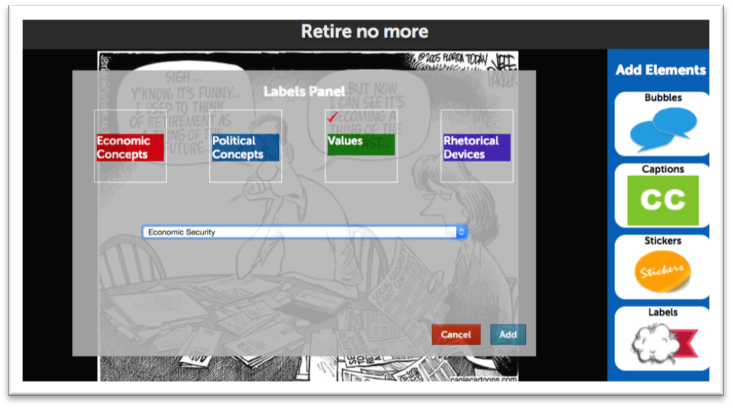
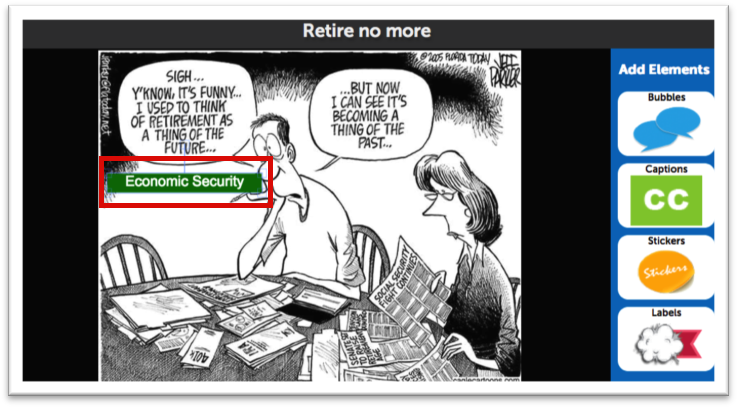
Labels
Labels are pre-defined keywords, organized into categories
like Economic Concepts, Political Concepts, Values and Rhetorical Devices. To
add a label to the cartoon, click the Labels button on the right edge of the screen, to open the Labels panel. Select a
label category by clicking on the colored text in the top row of the Labels
Panel. Select a specific label from the dropdown below, then click the Add button to add the
label to the cartoon. Drag the label to an appropriate location on the cartoon
that illustrates the selected concept.
Editing Questions, Bubbles and Captions
To edit the text you entered in a questions, bubble, or
caption, double-click it, edit the text in the pop-up window, then click the Add button to update the cartoon with
your edits.
Removing Image Annotations
To remove one of your annotation elements, double-click it, then click the Remove button in the pop-up window.
Hiding Annotation Elements
Clicking the bubble, question, caption, sticker and label
icons below the cartoon will hide or display the selected annotations. This may
be helpful if you wish to view the underlying cartoon without distractions. You
may also use the Opacity slider to fade the annotations.
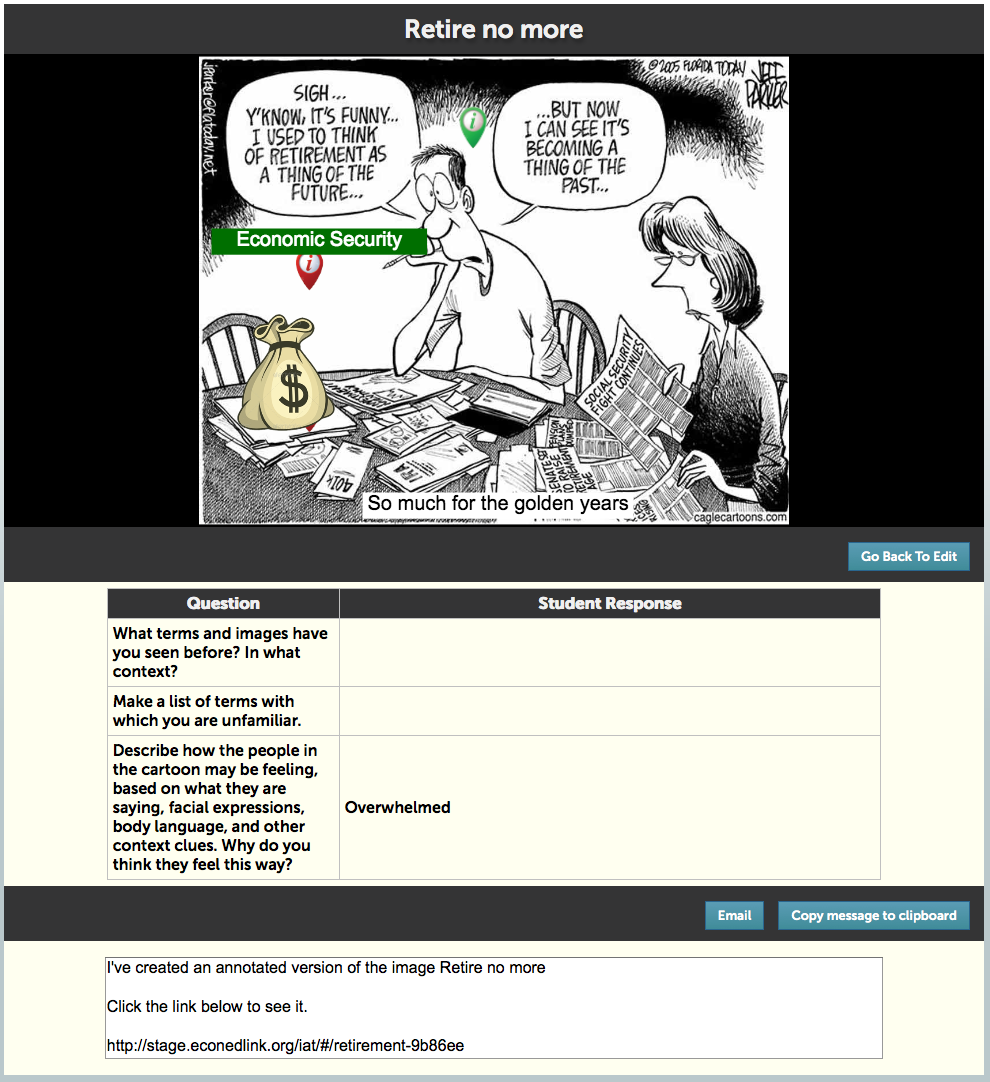
Publishing your Annotated Cartoon
When you’ve completed annotating your cartoon, click the Publish button to save your
annotations. The screen that follows provides several options for sharing your
creation with others:
- Click the Email button to automatically create a message in your default email application,
containing a link to your annotated cartoon. Address the email appropriately,
edit the email text if you like, and send it to your recipient. This option
requires locally installed email software, which may not be available on
devices like Chromebooks or tablets.'
- Click the Copy Message to Clipboard button to copy a pre-defined message that contains a
link to your annotated cartoon. You can paste this message into your choice of
communications software (Twitter, Skype, Slack, etc.).
If your device does not support this feature, you can also select, copy and
paste the text from the text box below the Email and Copy Message to Clipboard
buttons.
- Copy the link from your web browser’s address
bar and share it with others by whatever means you choose.
If you wish to make further changes to your creation, click
the Go Back to Edit button below the
cartoon.
Questions or Comments?
For further assistance in using this tool, or to report
problems encountered when using it, please complete and submit our Contact Us form, or email [email protected].
Your request will be automatically entered into our help desk system. An appropriate staff member will be assigned to assist you and will endeavor to respond within 24 hours of your request.